Introduction
React and Redux are two of the most popular JavaScript libraries used to create dynamic and interactive user interfaces. React is a library for building user interfaces, and Redux is a predictable state container for managing the state of your application. In this article, we will explore a React and Redux exercise that will help you learn how to use these two libraries together.
In this exercise, we will create a simple React application that uses Redux to manage the state of the application. We will create a basic counter application that allows the user to increment or decrement a counter.
Step 1: Setting Up Your Environment
Before we can start coding, we need to set up our environment. To follow along with this exercise, you will need to have Node.js and npm installed on your machine. You can download Node.js from the official website: nodejs.org/en/download.
Once you have installed Node.js, you can create a new React application using the create-react-app command. Open a terminal window and enter the following command:
npx create-react-app redux-counter
This will create a new React application in a directory called redux-counter.
Step 2: Installing Redux
Next, we need to install Redux. To install Redux, open a terminal window and navigate to the redux-counter directory. Once you are in the directory, enter the following command:
npm install redux react-redux
This will install Redux and the React bindings for Redux.
Step 3: Creating the Redux Store
The next step is to create the Redux store. In the src directory of your application, create a new file called store.js. In this file, we will create the Redux store.
import { createStore } from 'redux';

const initialState = {
  count: 0
};

function reducer(state = initialState, action) {
  switch (action.type) {
    case 'INCREMENT':
      return { count: state.count + 1 };
    case 'DECREMENT':
      return { count: state.count - 1 };
    default:
      return state;
  }
}

const store = createStore(reducer);

export default store;
In this code, we define an initial state with a count property set to 0. We also define a reducer function that takes the current state and an action as arguments and returns a new state based on the action. The reducer function handles two actions: INCREMENT and DECREMENT. When the INCREMENT action is dispatched, the count property of the state is incremented by 1. When the DECREMENT action is dispatched, the count property of the state is decremented by 1. Finally, we create the Redux store using the createStore function and export it.
Step 4: Creating the React Components
Now that we have created the Redux store, we can create the React components that will use the store to manage the state of the application. In the src directory, create a new file called Counter.js. In this file, we will create a React component that displays the current count and provides buttons to increment or decrement the count.
import React from 'react';
import { connect } from 'react-redux';

function Counter({ count, increment, decrement }) {
  return (
    <div>
      <h1>Count: {count}</h1>
      <button onClick={increment}>+</button>
      <button onClick={decrement}>-</button>
    </div>
  );
}

function mapStateToProps(state) {
  return {
    count: state.count
  };
}

function mapDispatchToProps(dispatch) {
  return {
    increment: () => dispatch({ type: 'INCREMENT' }),
    decrement: () => dispatch({ type: 'DECREMENT' })
  };
}

export default connect(mapStateToProps, mapDispatchToProps)(Counter);
In this code, we define a React component called Counter. The Counter component takes three props: count, increment, and decrement. The count prop is the current count value from the Redux store, and the increment and decrement props are functions that dispatch the INCREMENT and DECREMENT actions to the Redux store, respectively.
We also define two functions: mapStateToProps and mapDispatchToProps. The mapStateToProps function maps the state of the Redux store to the count prop of the Counter component. The mapDispatchToProps function maps the increment and decrement props of the Counter component to dispatching the INCREMENT and DECREMENT actions to the Redux store, respectively.
Finally, we use the connect function from the react-redux library to connect the Counter component to the Redux store.
Step 5: Rendering the Application
The final step is to render the Counter component in the App.js file. In the src directory, open the App.js file and replace the default code with the following:
import React from 'react';
import Counter from './Counter';

function App() {
  return (
    <div>
      <Counter />
    </div>
  );
}

export default App;
This code imports the Counter component and renders it in the App component.
Step 6: Running the Application
To run the application, open a terminal window and navigate to the redux-counter directory. Then enter the following command:
npm start
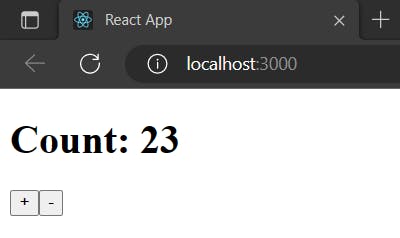
This will start the development server and open the application in your default web browser. You should see a simple counter application with a count of 0 and two buttons to increment or decrement the count.
Step 7: Wrap the App component with the Provider component
To ensure that the Counter component has access to the store object, we need to wrap the root component App with the Provider component and pass the store object as a prop.
Here's an example of how to do this in the index.js file:
import React from 'react';
import ReactDOM from 'react-dom';
import { Provider } from 'react-redux';
import store from './store';
import App from './App';

ReactDOM.render(
  <Provider store={store}>
    <App />
  </Provider>,
  document.getElementById('root')
);
In this example, we import the Provider component from the react-redux package, and the store object from our store.js file. We then wrap the App component with the Provider component and pass the store object as a prop.
With this step, the Counter component should now be able to find the store object and display the current count value.

Congratulations! You have successfully implemented Redux with React and created a simple counter application that allows the user to increment or decrement a counter.
