React Router is a popular library for handling routing in React applications. It allows developers to define routes and link them to specific components, enabling users to navigate between different pages of the application.
In this exercise, we will implement React Router in a simple React application and learn how to create and link different routes.
Prerequisites
Before getting started, make sure you have the following installed on your local machine:
Node.js
NPM (Node Package Manager)
Step 1: Create a new React application
Open your terminal and create a new React application using the following command:
npx create-react-app react-router-app
This will create a new React application in a directory named react-router-app. Navigate to this directory using the cd command:
cd react-router-app
Step 2: Install React Router
Next, we need to install React Router. Run the following command in your terminal:
npm install react-router-dom
This will install React Router and its dependencies in your application.
Step 3: Create some components
Let's create some components that we will use as our application's pages. Create two files named Home.js and About.js in the src directory of your application. In each file, create a simple component that displays some text:
// Home.js
import React from 'react';

const Home = () => {
  return (
    <div>
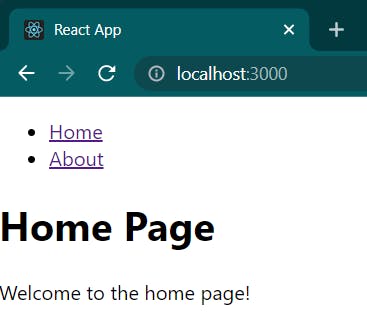
      <h1>Home Page</h1>
      <p>Welcome to the home page!</p>
    </div>
  );
}

export default Home;
// About.js
import React from 'react';

const About = () => {
  return (
    <div>
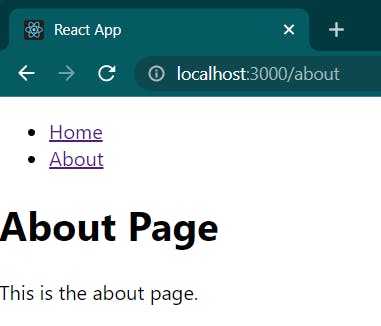
      <h1>About Page</h1>
      <p>This is the about page.</p>
    </div>
  );
}

export default About;
Step 4: Define routes
Now we need to define routes for our application. Open the App.js file in the src directory and replace its contents with the following code:
import React from 'react';
import { BrowserRouter as Router, Switch, Route, Link } from 'react-router-dom';
import Home from './Home';
import About from './About';

const App = () => {
  return (
    <Router>
      <div>
        <nav>
          <ul>
            <li>
              <Link to="/">Home</Link>
            </li>
            <li>
              <Link to="/about">About</Link>
            </li>
          </ul>
        </nav>

        <Switch>
          <Route path="/about">
            <About />
          </Route>
          <Route path="/">
            <Home />
          </Route>
        </Switch>
      </div>
    </Router>
  );
}

export default App;
Let's go through this code step by step. First, we import the BrowserRouter, Switch, Route, Link components from the react-router-dom library, as well as our Home and About components.
We then wrap our application in a Router component. Inside this component, we define a navigation menu using the Link component. Each Link component has a to prop that specifies the path it should link to.
We also define a Switch component that renders the appropriate component based on the current URL path. We define two Route components inside the Switch component, one for the home page (/) and one for the about page (/about). Each Route component has a path prop that specifies the URL path it should match, and a component that should be rendered if the path matches.
Step 5: Run the application
Now that we have our application set up, let's run it and see how it works. In your terminal, run the following command:
npm start
This will start the development server and open your application in a web browser at http://localhost:3000/. You should see the home page with a navigation menu. Clicking on the "About" link should take you to the about page.
Step 6: Customize the routes
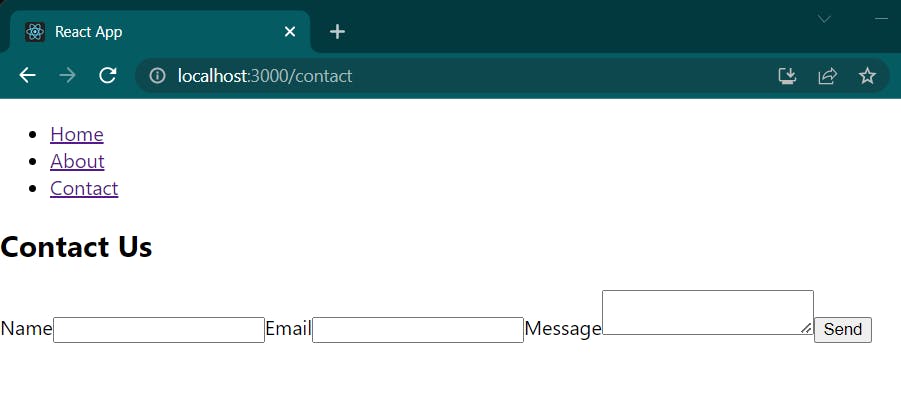
You can customize the routes to match your application's needs. For example, you can add more routes for additional pages, or you can change the path for existing routes. Here's an example of how you can add a new route for a contact page:
import React from 'react';
import { BrowserRouter as Router, Switch, Route, Link } from 'react-router-dom';
import Home from './Home';
import About from './About';
import Contact from './Contact';

const App = () => {
  return (
    <Router>
      <div>
        <nav>
          <ul>
            <li>
              <Link to="/">Home</Link>
            </li>
            <li>
              <Link to="/about">About</Link>
            </li>
            <li>
              <Link to="/contact">Contact</Link>
            </li>
          </ul>
        </nav>

        <Switch>
          <Route path="/about">
            <About />
          </Route>
          <Route path="/contact">
            <Contact />
          </Route>
          <Route path="/">
            <Home />
          </Route>
        </Switch>
      </div>
    </Router>
  );
}

export default App;
import React from 'react';

const Contact = () => {
  return (
    <div>
      <h2>Contact Us</h2>
      <form>
        <label htmlFor="name">Name</label>
        <input type="text" id="name" name="name" />

        <label htmlFor="email">Email</label>
        <input type="email" id="email" name="email" />

        <label htmlFor="message">Message</label>
        <textarea id="message" name="message"></textarea>

        <button type="submit">Send</button>
      </form>
    </div>
  );
}

export default Contact;
Here we added a new Link component for the contact page, and a new Route component for the contact page as well.
Application Screenshots


Conclusion
In this exercise, we learned how to implement React Router in a simple React application. We defined routes using the BrowserRouter, Switch, Route, and Link components from the react-router-dom library. We also created some components to use as pages and customized the routes to match our application's needs.
By using React Router, we can easily add routing to our React applications and enable users to navigate between different pages.
